
How to Pack for a Move:
A Room-by-Room Guide
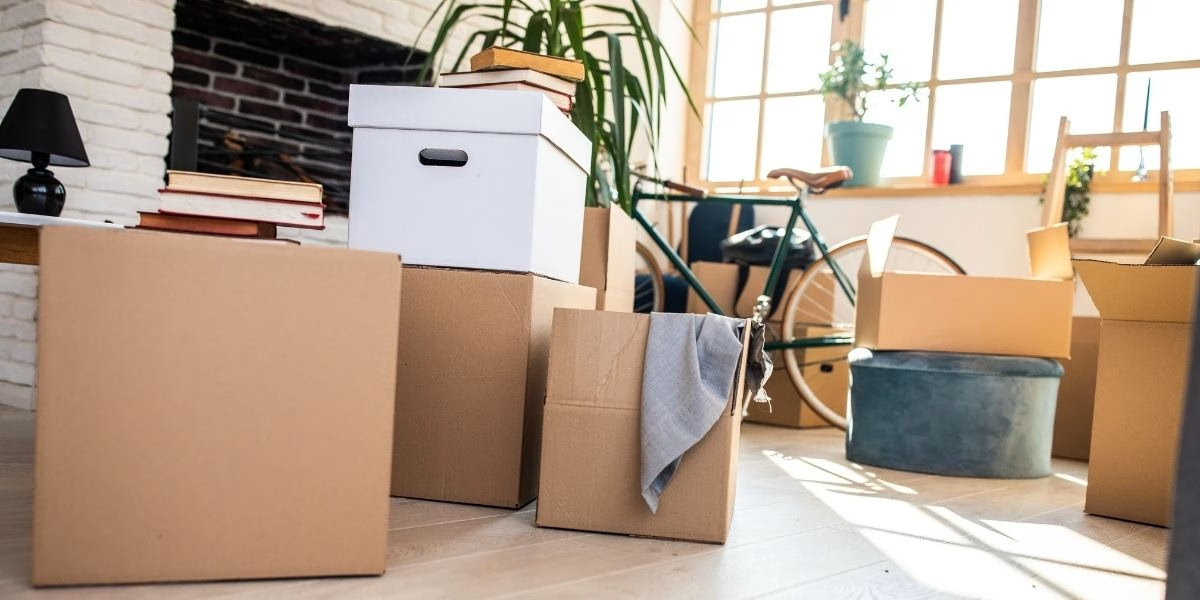
Knowing how to pack for a move is one of those things that sounds straightforward until you’re actually doing it. Packing can eat up a lot of your time, so it’s important to be efficient while also making sure your belongings are well protected in the moving truck. The good news is that there’s a right way to approach it, and you don’t have to figure it out on your own.
At Keepsake PCO, we’ve packed hundreds of homes across the Twin Cities alongside our partners at College Muscle Movers. That experience has taught us what separates a smooth, organized pack from a chaotic one. This room-by-room packing guide shares everything we’ve learned, from time-saving techniques to protecting your belongings in transit, so your move stays on track and unpacking feels manageable.
Before You Start: Supplies and Timing
Get the Right Supplies First
This step is more important than you’d think. Having to stop mid-pack to get more supplies is one of the most common ways packing days get disrupted.
Plus, having the right boxes will help you make sure your belongings will be in good condition when you unpack.
Before you get started, make sure you have:
- Boxes in multiple sizes — small boxes for books and heavy items, medium for kitchen and general use, large for linens and pillows. Dish pack boxes (double-walled) for kitchen fragiles.
- Packing paper — an underrated part of packing that helps a lot. Use it to wrap miscellaneous items, fill empty space in boxes, and protect anything that can scratch.
- Bubble wrap — for fragile items: glassware, ceramics, framed art, electronics.
- Strong packing tape and a dispenser — don’t skimp here. Cheap tape will fail when used on heavy boxes.
- Permanent markers — for labeling every box with its room and a brief description of contents.
- Plastic bags — for hardware, screws, and small loose items that are easy to lose track of.
If you’re in the Twin Cities, College Muscle Movers sells packing supplies with volume discounts — 10% off orders over $50, 15% off orders over $100, and 20% off orders over $200. You can order online and pick up at their Saint Paul warehouse, or have supplies delivered to you.
When to Start Packing
Most people start too late. A good rule of thumb is to begin packing four to six weeks before your move date. That sounds like a lot of runway, but it goes faster than you’d expect once you account for work and daily life. Plus it will give you plenty of time to declutter before your move, another thing we highly recommend doing.
Start with the rooms you use least, like storage areas, closets, spare bedrooms, and the garage. These can be packed weeks in advance without affecting your daily life. The kitchen is the most time-consuming room to pack, so aim to start it at least two weeks before your move date. Leave out a small set of essentials — a pot, a few dishes, basic utensils — that you can use during your final days in the home, and pack everything else.
Most Important Tips for Packing Before a Move
These are the key tips that apply in every room:
What to pack first when moving: Seasonal items, books, decorative objects, and rarely-used gear.
What to pack last: all your daily essentials, like toiletries, a few sets of clothes, phone chargers, coffee maker. Everything else falls somewhere in between, and the room-by-room guide below gives you the full order.
One room at a time. Mixing items from different rooms into the same box is one of the most common packing mistakes. It makes unpacking significantly harder and increases the chance something gets lost.
Label every box, every time. Write the destination room and a brief description on at least two sides of the box. “Kitchen — pots and pans” is more useful than “Kitchen.” On moving day, when boxes are stacked four high in a truck, you’ll be glad you did.
Keep boxes under 50 pounds. Heavy items — books, dishes, tools — go in small or medium boxes. Light, bulky items — pillows, linens, lampshades — go in large boxes. Any box over 50 lbs is hard to carry and increases the risk of the box failing under the weight.
Don’t leave boxes with empty space. Half-full boxes will get squashed under weight in the truck and give items room to shift and break. Fill gaps with packing paper, towels, or linens.
Room-By-Room Packing Guide
Garage, Basement, and Storage Areas
These are the best places to start, usually weeks before you need to pack anything else. These spaces tend to hold the highest density of things you haven’t touched in years, and clearing them first gives you momentum, extra boxes, and packing materials you forgot you had.
- Tools: Wrap sharp edges. Drain any fuel from gas-powered equipment before moving — it’s a safety and transport requirement.
- Paints and chemicals: Many moving companies won’t transport hazardous materials. Check with your movers in advance and plan to use, donate, or dispose of paints, solvents, and cleaning chemicals before moving day.
- Seasonal items: These can be packed earliest of all. Label clearly by season and content.
- Mystery boxes from the last move: Moving is a good time to finally open them. If you didn’t need what’s inside for the past few years, you probably won’t need it at your next home either.
How to Pack Your Kitchen for a Move
The kitchen is the most time-consuming room in the house to pack, and it’s not close. In our experience across hundreds of packing services, the kitchen consistently takes longer than any other single room — regardless of home size. When we coordinate professional packing teams, one packer is always assigned to the kitchen first, and they stay there until it’s done.
Why does it take so long? Dishes and glassware need to be individually wrapped. Appliances need padding and often their original boxes if you still have them. Pantry items are bulky and heavy. Pots and pans nest awkwardly. It adds up.
Pack the kitchen like this:
- Glassware and dishes: Wrap each piece individually in packing paper. Stand plates on their edge in the box — they’re less likely to break than when stacked flat. Use a dish pack box (double-walled) for your most fragile pieces.
- Pots, pans, and bakeware: Nest smaller pans inside larger ones with a layer of paper between each. Lids can be wrapped and packed on their side.
- Small appliances: Wrap in bubble wrap or moving blankets and pack snugly. If you have the original box, use it.
- Pantry: Pack canned goods in small boxes — they get heavy fast. Dispose of anything open or nearly empty rather than moving it. For items you want to keep, seal open packages in zip-lock bags before boxing.
- Knives: Wrap each knife individually in several layers of paper and tape them so the edge can’t cut through. Never pack knives loose.
- Leave until the end: Coffee maker, one pot, a few plates and utensils — whatever you need for the final days in your current home.
Living Room
The living room is usually the most visible room in the house but not the hardest to pack. The main challenge is large, awkward, or fragile items: artwork, mirrors, electronics, and furniture that needs disassembly.
- Artwork and mirrors: Use picture boxes for framed pieces when possible. Wrap in paper first, then bubble wrap, then cardboard corners. Mark the box “Fragile — Do Not Lay Flat.”
- Electronics: Take a photo of how everything is connected before you unplug anything. Label each cord with a piece of tape and a marker. Pack remotes, cables, and accessories in clearly labeled bags. Flat-screen TVs should go in a TV box — worth the investment to avoid a cracked screen.
- Books: Small boxes only. Alternate the direction books are packed (spine to pages) to distribute weight more evenly.
- Decorative items: Wrap anything ceramic, glass, or breakable in paper and pack with padding around them.
- Furniture: Disassemble what you can. Keep all hardware in labeled plastic bags taped to the piece of furniture it belongs to.
Bedrooms
Bedrooms are generally more straightforward than the kitchen, but closets — especially full ones — can surprise you.
- Clothing: Wardrobe boxes are the most efficient option for hanging clothes; they let you transfer a closet rod’s worth of clothes directly without folding. For folded clothing, dresser drawers can often be transported as-is (with the drawer removed and wrapped in stretch wrap) rather than emptied into boxes.
- Bedding and linens: Large boxes or bags. Comforters, pillows, and duvets are great box-fillers for oddly shaped spaces.
Closets: Don’t underestimate them. Closets accumulate more than you think — shoes, seasonal items, old electronics, forgotten gear. Go through each closet deliberately before packing, and use this as an opportunity to edit. - Nightstands and dressers: Empty drawers before moving them. Small items from drawers go into labeled bags or boxes.
Jewelry and valuables: Pack these yourself, separately, and transport them in your personal vehicle rather than the moving truck.
Bathrooms
Bathrooms are quick to pack but easy to underestimate, especially around liquids and products that can leak.
- Liquids: Place bottles in zip-lock bags before boxing. Shampoo, lotion, and cleaning products can and do leak under pressure — and a leaking bottle can ruin everything else in the box.
- Medicine cabinet: Check expiration dates before packing. Anything expired can go. Medications should be packed in a clearly labeled, accessible bag and transported with you rather than in the truck.
- Towels: Useful as padding material for fragile items in other rooms. Pack them with the bathroom but don’t box them until you’ve used them up as padding elsewhere.
Home Office
The office has two categories that require special care: electronics and documents.
- Computers and monitors: Back up your data before you pack anything. Original boxes are best; if you don’t have them, wrap monitors in bubble wrap and pack them snugly in a box with padding on all sides.
- Documents: Keep important documents — financial records, passports, insurance policies, lease or closing documents — out of the moving truck entirely. Transport them with you.
- Books and files: Small boxes. Label by subject or category if it matters to you.
- Desk supplies: Consolidate into one or two boxes. Rubber band or bag items that would otherwise scatter.
Packing Checklist for Moving
Use this as a quick reference to track your progress room by room.
Before you start
Packing supplies purchased and on hand
Timeline set — packing start date and room-by-room schedule mapped out
Decluttering done (or in progress) before packing begins
Dishes and glassware wrapped and boxed
Pots, pans, and bakeware packed
Small appliances wrapped and boxed
Pantry sorted — open items sealed, expired items discarded
Knives wrapped safely
Daily essentials set aside (last to pack)
Artwork and mirrors in picture boxes or wrapped securely
Electronics photographed, unplugged, cords labeled
Books in small boxes
Furniture hardware in labeled bags
Hanging clothes in wardrobe boxes
Folded clothing packed or drawers wrapped
Closets fully packed and edited
Valuables set aside for personal transport
Liquids in zip-lock bags
Expired medications disposed of
Towels used as padding, then packed
Data backed up
Important documents set aside for personal transport
Electronics wrapped and packed
Hazardous materials disposed of or donated
Tools wrapped and packed
Seasonal items labeled by season
When it Makes Sense to Hire Packers
Packing an entire home is a significant undertaking. It takes a team of two professional packers around 4–5 hours to pack up a one-bedroom apartment. A two-bedroom runs 5–6 hours. Expect it to take you double that if you tackle it on your own. Larger homes can easily take as much as 30 total hours to pack.
You don’t have to hand off everything to make professional packing worthwhile. Partial packing — where a team handles the kitchen and fragile items while you pack the rest — is one of the most common approaches we see, and often the smartest. The kitchen alone accounts for a disproportionate share of packing time and risk; handing that room off while handling the rest yourself is a practical way to save both time and stress without the full cost of a complete pack.
Keepsake PCO offers both full and partial packing services across the Twin Cities. If you’re weighing your options, we’re happy to talk through what makes sense for your home and timeline.
Get a quote from Keepsake PCO for packing or move-out cleaning services.
About the Author

Claire Hensley
Cleaning Specialist
Claire Hensley is a cleaning specialist at Keepsake PCO with hands-on experience helping Twin Cities homeowners maintain cleaner, more comfortable homes. Claire writes about cleaning tips, home maintenance, and what professional cleaning actually looks like from the inside.
More Motivation & Tips
DIY Packing vs. Hiring a Packing Service: How to Decide
DIY packing vs. hiring a packing service? Compare real Twin Cities costs, time, and breakage risk, plus a simple way to decide what fits your move.
How Long Does It Take to Pack a House? Real Twin Cities Data
How long does it take to pack a house? Real Keepsake data shows professional packing times by home size, room estimates, and DIY timelines.
Essential Packing Supplies for Your Move
Essential packing supplies for a Twin Cities move, from a packing pro. What to buy, what to skip, and how to protect your belongings.